Overview
This page describes how to create a GR-ADZUKI sketch (also called a “program”) using a web compiler with either a Windows or Mac operating system.
Preparation
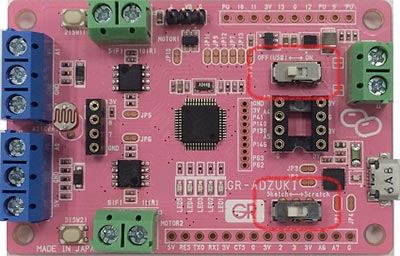
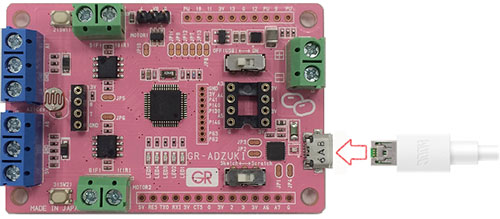
To begin, you will need a GR-ADZUKI board and a USB cable (Micro B type). As shown in the photo here, make sure the slide switch on the upper half of the board is set to USB and the slide switch on the lower half of the board is set to Sketch.

Protocol
1. Logging Into the Web Compiler
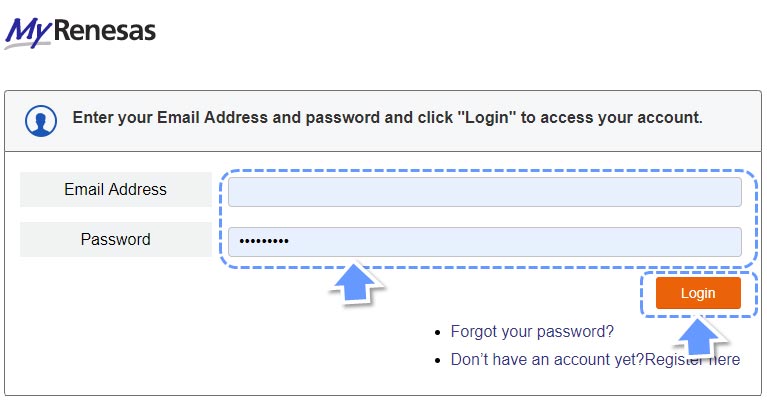
Log into the web compiler from the Gadget Renesas top page.
Click on the page image to the right and the top page will be displayed in a new tab.

Enter your MyRenesas account information and click Sign In.
2. Creating the Project
Use the button as shown here to create your new project. Those logging in for the first time should skip this.
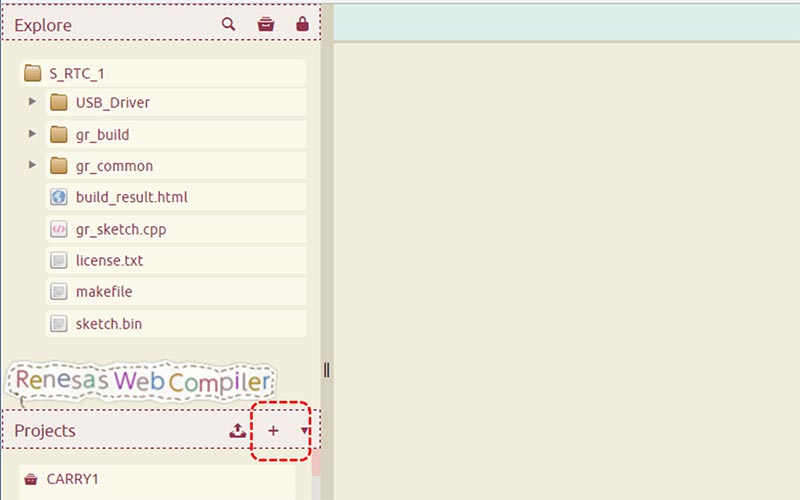
As shown on the screen here, select GR-ADZUKI_Sketch_xxx.zip (xxx indicates the version you are using), input a suitable project name and click Create Project.

3. Sketch Display
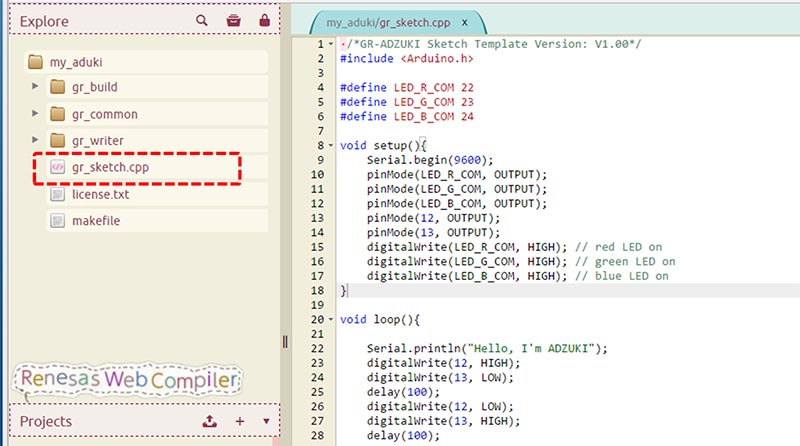
This brings you to the Create Project page. Double-clicking on gr_sketch.cpp in the Explore area to the left will bring up a program.
This is the sketch (program) used to operate GR-ADZUKI.
4. Building a Sketch
(Creating Files to Compile and Write)
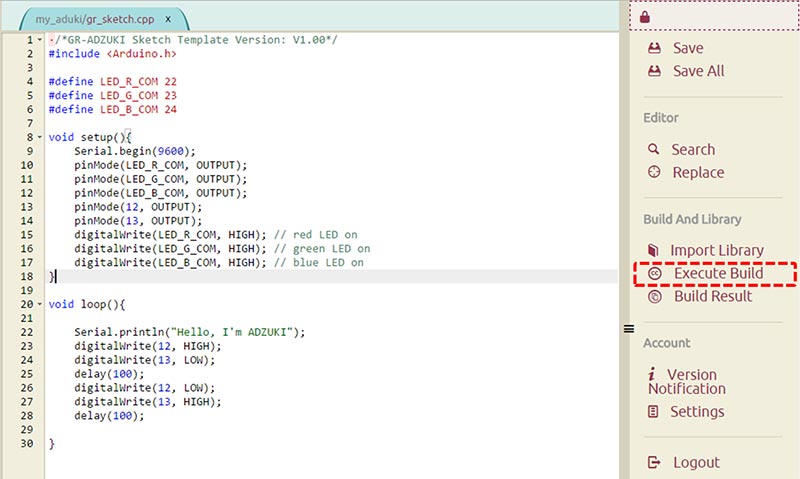
This window is used for writing a program. The sample program for lighting the LED on a GR-ADZUKI board is already completed.
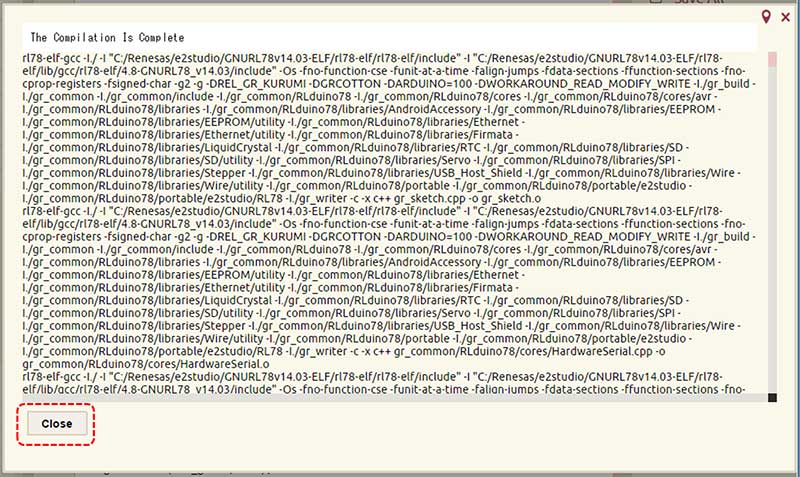
Click Execute Build in the navigation area to the right of the screen. After the build is successfully completed, you will see the phrase Compile is Complete.
Note that the first build for a newly created project or sketch takes longer than normal, because all of the files are being compiled.
As shown here, the results of the build will be displayed on the screen. If the program is successful, the page will indicate that Compile is complete. Click Close to close the page.
5. Downloading the Sketch
(Storing the File to be Written to the Computer)
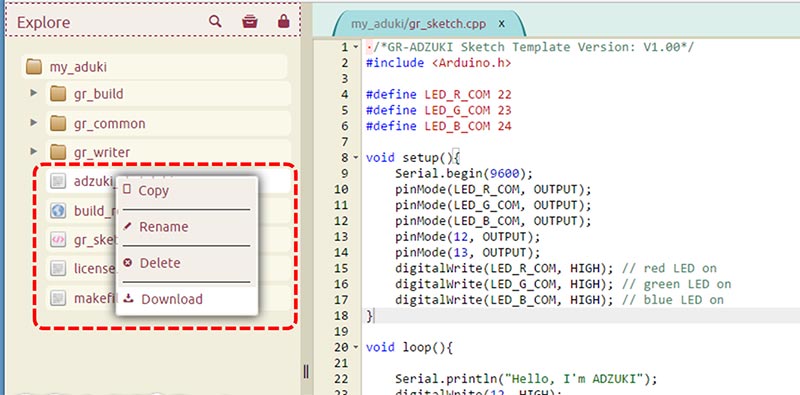
If the build is successful, an adzuki_sketch.bin file will be created. Next, open the context menu above the file name and choose Download to download the sketch to your computer.
6. Download KurumiWriter
(Software to Write the Sketch)
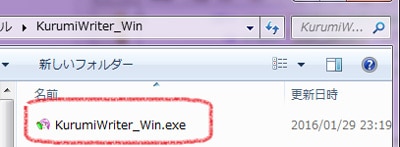
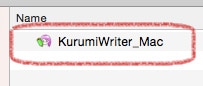
Download the KurumiWriter to your PC; this is the software that will enable you to write the GR-ADZUKI sketch. Download KurumiWriter for Windows or Mac using the links to the right, and decompress the zip file on your PC. If using a Mac, the file will be automatically decompressed and added to your application folder.
Download the Software
- KurumiWriter for Windows (ZIP)
- KurumiWriter for Mac (ZIP)
7. Connect GR-ADZUKI to Your Computer with a USB Cable
If you see a message that the USB driver cannot be located, obtain a USB driver from the FTDI website and confirm that your computer acknowledges it.
8. KurumiWriter Activation
Activate the KurumiWriter.
Windows
Mac
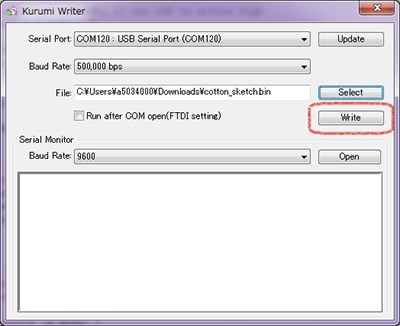
9. Configuring KurumiWriter
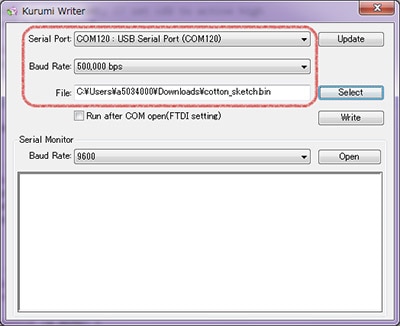
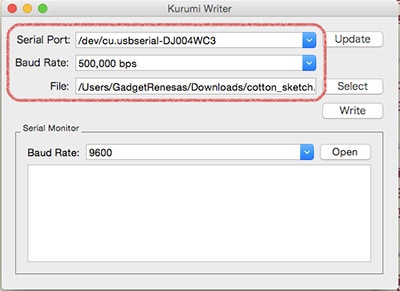
Configure KurumiWriter as follows:
- Serial Port: USB Serial Port (COM **) (for Windows) or /dev/cu.serial-*** (for Mac)
- Baud Rate: 500,000bps (or 112,500bps)
- File: Select adzuki_sketch.bin that was downloaded from the web compiler
Windows
Mac
10. Writing the Sketch
Click Write on KurumiWriter to start the write process.
If you get an error message, follow these steps:
- Click the Write button again. Does anything change? (A communication error message due to timing may appear if a sketch that implements serial communication has already been sent.)
- Does the write process start when the baud rate is 112,500bps? (The transmission speed can be too slow even when using a data communications cable.)
- Are the GR-ADZUKI slide switches correctly set to USB and Sketch?
- Is the USB cable firmly inserted?
Windows
Mac

Congratulations
The LED on GR-ADZUKI should turn on when the write process is complete.
Gently shake the GR-ADZUKI board. Do you see how the LED lights up in the shape of a heart?


