Overview
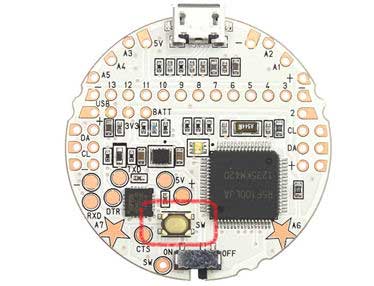
This project introduces usage of the GR-COTTON board's button switch.
Preparation
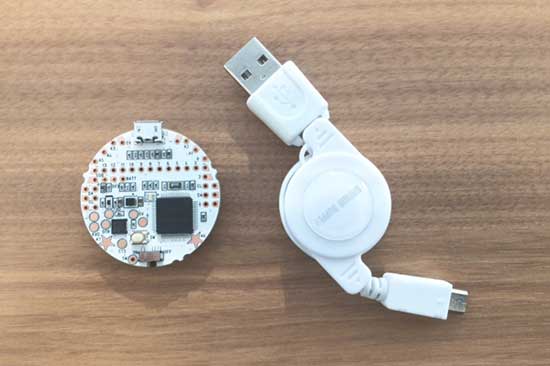
You will need a GR-COTTON board and a USB cable (Micro B type).
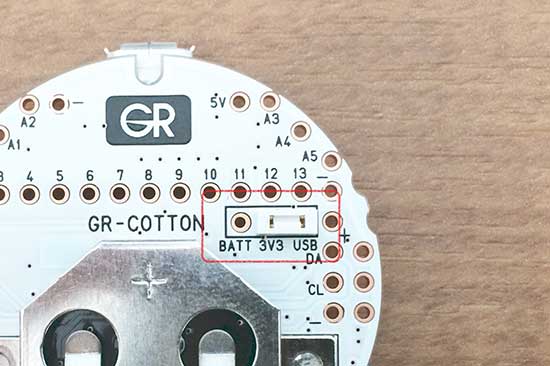
Make sure the white jumper on the reverse side of GR-COTTON is moved to the “3V3 USB” side. If it is set to the BATT side, remove and reinsert it into the USB side.
The sample below programs the red LED light to flicker when the GR-COTTON button switch is pressed.
#include <arduino.h>

void sw_push(){
  digitalWrite(22, LOW);
  delayMicroseconds(10000); // 10ms
  digitalWrite(22, HIGH);
}

void setup() {
  pinMode(2, INPUT_PULLUP);
  attachInterrupt(0, sw_push, FALLING);

  pinMode(22, OUTPUT); //red led
  digitalWrite(22, HIGH);
}

void loop() {
}
In the previous example, the MCU continued to work until the button switch was pressed. The sample below shows how to conserve power by using the STOP mode.
This sample appears to function the same as the one above (merely changing the LED color), but there are differences, such as battery life. This function is unique to GR-COTTON and GR-KURUMI.
#include <arduino.h>

void sw_push(){
  digitalWrite(23, LOW);
  setPowerManagementMode(PM_NORMAL_MODE);
  delayMicroseconds(10000); // 10ms
  digitalWrite(23, HIGH);
}

void setup() {
  pinMode(2, INPUT_PULLUP);
  attachInterrupt(0, sw_push, FALLING);

  pinMode(23, OUTPUT); //green led
  digitalWrite(23, HIGH);
}

void loop() {
  setPowerManagementMode(PM_STOP_MODE);
  delay(0xffffffff); // into stop mode
}
The sample continues illumination of the LED while the button switch is pressed.
The status of the button switch is checked using DigitalRead.
#include <arduino.h>

void sw_push(){
  digitalWrite(24, LOW);
  setPowerManagementMode(PM_NORMAL_MODE);
  while(digitalRead(2) == LOW);
  digitalWrite(24, HIGH);
}

void setup() {
  pinMode(2, INPUT_PULLUP);
  attachInterrupt(0, sw_push, FALLING);

  pinMode(24, OUTPUT); //blue led
  digitalWrite(24, HIGH);
}

void loop() {
  setPowerManagementMode(PM_STOP_MODE);
  delay(0xffffffff); // into stop mode
}
This sample shows how to display a message in the serial monitor by pressing the button switch (the sw_push process in the sketch).
Incidentally, serial class cannot be used during an interrupt triggered by the button switch. Therefore, the program waits for information that the switch has been pushed in the global variable g_sw_push, monitoring it from the loop.
#include <arduino.h>

boolean g_sw_push = 0;
void sw_push(){
  g_sw_push = 1;
  delayMicroseconds(1000); // for cutting chattering
}

void setup() {
  Serial.begin(9600);
  pinMode(2, INPUT_PULLUP);
  attachInterrupt(0, sw_push, FALLING);
}

void loop() {
  if(g_sw_push == 1){
    Serial.println("Hi!");
    Serial.flush();
    g_sw_push = 0;
  }
}


